How to dress as a scary zombie for Halloween on a budget
It’s that time of the year again. Kids are back in school, the days are getting shorter, the leaves are turning brown, and…you know what that means? Spooky, scary costumes!
Halloween fancy dress costumes can be very expensive, but you can have fun making your own grisly, ghoulish costumes – ones that’ll be much better than the ones found in the shops – using things already around the house. Best of all, it’ll cost you very little to get an authentically creepy Halloween look.
You can use the tips below to transform yourself into a range of spooky beings (witches, wizards etc.) and especially for zombie fancy dress costumes – you’ll freak your friends out.
You can achieve an authentic zombie look through easy aging and distressing techniques, using common household items and old clothes. We promised you a cheap zombie costume and we meant it!
Here are more cheap Halloween costumes – for kids this time…
Step 1: Rummage through your wardrobe
Start by looking through your wardrobe for old, unloved clothing that you’d be willing to modify and use for a costume. The scruffier the better.
Dig out that old sweatshirt you’ve kept back for DIY. The skirt that you’ve been meaning to fix the hem on. The shirt with the stubborn stains. Just as long as you don’t mind not being able to wear it on a ‘normal’ day, you can use it.
Step 2: Artificially age your clothes
Once you have chosen the clothing for your costume, you’re ready to begin the aging and distressing process. This is to make the clothes look old, worn, dirty and, most importantly, creepy, just as though you’ve risen from the grave or gone through a zombie apocalypse.
The easiest (and cheapest) aging technique for clothing is tea dying (this isn’t the feeling you get when you’re dying for a cup of tea!).
This discolours the fabric in the way that would occur naturally over time and is especially effective with lighter coloured cloth. Different teas will give you different tones, but for our tips we’re just using ordinary black tea.
(Bonus money-saving tip: save the ones you’ve used for your cuppas and re-use them; you’ll just need to steep them for a bit longer).
To discolour the clothes you’ll need the following items:
- Tea bags (approximately five, but for a darker dye you can use more)
- Large pan
- Water
- Tongs
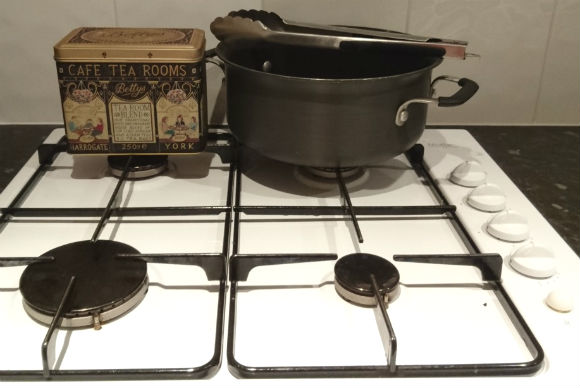
Now follow this easy recipe:
- Fill the pot with water to about three-quarters full, enough to cover the clothing completely when submerged
- Bring the water to a boil and then take the pot off the heat
- Put tea bags in the water and it let steep for at least three minutes (leaving it longer will make the colour more intense)
- Remove the tea bags from the hot water
- Using the tongs (so you don’t risk scalding yourself) take the items of clothing, one at a time, and place them in the pot. Ensure the clothing is completely immersed
- Soak for at least 15-20 minutes. You could soak for an hour, or even longer (the longer you leave your clothes in the tea, the darker the clothing will be)
- Remove the clothes with the tongs and squeeze out any excess water
- Lastly, you’ll need to dry the clothing to help the tea dye set in the fabric. You can line dry it or pop it in the dryer
SAFETY WARNING: Be very careful when fishing tea bags and clothes out of boiling water!
Step 3: Distressing
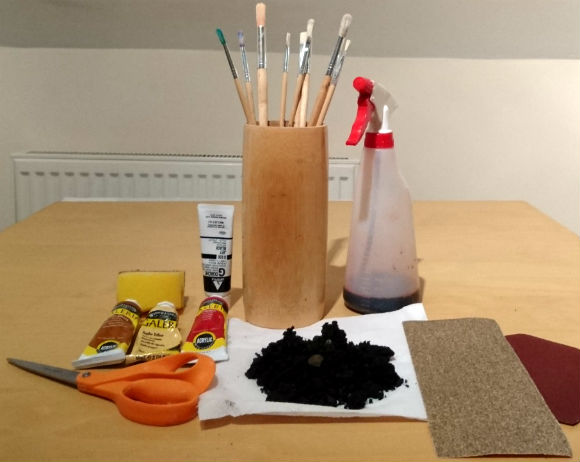
Once your tea-dyed clothing is completely dry, you’ll be able to start distressing it, to make it look more worn and dirty. Here are some options:
- Cutting: Cut the edges and seams to create frayed, uneven edges and rips. Try cutting some random holes in the fabric to look like zombie bites
- Sanding: You can use sandpaper to wear down the fabric of the clothing. Sandpaper also helps fray the freshly cut edges and seams of the clothing, making it look as though it’s falling apart.You can use different grades of sandpaper, if you have it on hand, using the coarser paper first and then switching to finer paper to finish.
- Wearing: A wire brush can also be used to help wear down the fabric and cause fraying. If you don’t have any sandpaper or wire brushes, then you can also rub the clothing between some rocks or bricks.
- Paint: You can use acrylic and/or water based paints to add fake dirt and blood splatters to your costume.
- Fake dirt and dust: You can grind up some coffee or tea into a powder and put this powder in a pair of old tights to sprinkle fake dirt on your costume. Make sure to tie the tights before shaking them over the clothing! You can also brush the tights up against the clothing directly for dirt smears.To make fake dust, you can replace the coffee/tea with flour inside the tights. If you lightly spray the clothes with hairspray, more of the ‘dirt’ will stick.
- Real dirt: If you’re really daring and don’t mind getting dirty, you can always step on the clothing with mucky boots to rub it in some real soil and dirt.Better yet, get the kids to play outside in the mud wearing their costumes for a very natural dirty look.
Step 4: Add some fake blood!
If you want to make your costume especially gruesome and gory, then you’ll definitely want to create some homemade fake blood. We’ve found some cheap, non-toxic, and edible (but, admittedly, not delicious) recipes you can try at home. They’re safe for kids too.
Fake Blood Recipe #1
Ingredients:
- Golden syrup – 332g (£0.55)
- Water – 1 tbsp (£0.00)
- Red food colouring – 2 tbsp (£0.78)
- Yellow food colouring – 1 tsp (£0.13)
- Total cost: £1.46
Directions:
- Mix all ingredients together in a bowl. That’s it, done.
We say: “This recipe is a bit expensive due to using a lot of food colouring, but it has good texture and vibrant colour.”
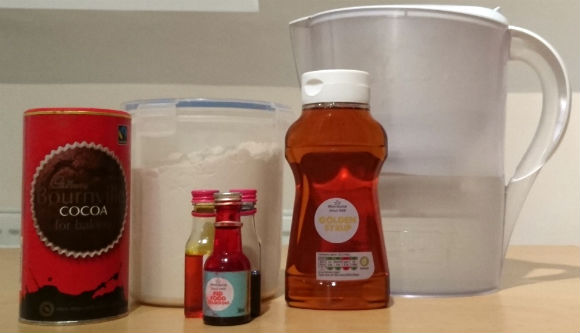
Fake Blood Recipe #2
Ingredients:
- Warm water – 120ml (£0.00)
- Golden syrup – 4 tbsp (£0.14)
- Cocoa powder – 1 tbsp (£0.06)
- Red food colouring – 1 tsp (£0.13)
- Total cost: 33p
Directions:
- Mix warm water and golden syrup together in a bowl
- Add cocoa powder and mix well to remove lumps
- Add food colouring and mix again
We say: “Too watered down and I’d recommend sifting the cocoa powder before adding it, to reduce clumps. Overall this fake blood has a great dark colour though, and it’s cheap.”
Fake Blood Recipe #3
Ingredients:
- Water – 250ml plus 1 ½ tbsp (£0.00)
- Corn starch/plain flour – 1 ½ tbsp (£0.06)
- Red food colouring – 2 tsp (£0.26)
- Blue food colouring – ½ tsp (£0.07)
- Total cost: 39p
Directions:
- Bring the water to a simmer
- In a bowl, mix corn starch with 1 ½ tbsp of cold water to get a smooth paste
- Turn down the heat and add the corn starch mixture to the water and stir until it thickens
- Add the food colouring until you get your desired red colour
- Let cool and then apply
We say: “Prone to clumps and too pink, instead of a deep red, but it’s fairly cheap.”
You can apply the fake blood directly onto the costumes with brushes, spray bottles or your hands – just be aware that some food colourings may stain clothing and your skin. You can always do a skin and/or fabric test to see if you’re happy with the fake blood before applying more of it.
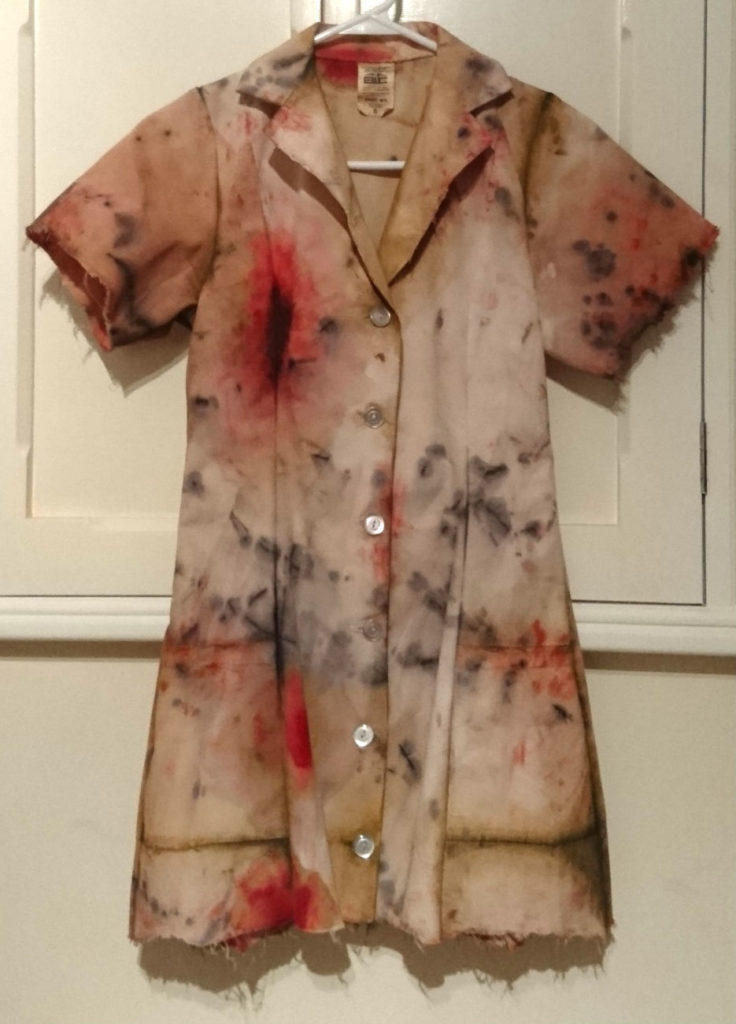
Your DIY Halloween costumes should just turn out looking something like this…
Step 5: Make-up
To finish off your costume, you need to look as though you’ve had a really rough night!
- Rub in the fake dirt under your eyes and in the hollows of your cheeks. If you have some brown or grey eye shadow, use that instead to create a bruised effect on your face
- Make yourself look deathly pale by powdering your face with dust (such as flour or talcum powder)
- Sprinkle or sieve some plain flour or talcum powder on your head too for that dusty, just out of the grave, look
Now get out there and scare people!
Tags DIY costumeshalloweenmoney saving tipszombie costumes
Related Posts
There are very few things in life like a good night’s sleep....
Read more
We all know that your budget can change often, which is why...
Read more
What’s everyone talking about in the world of debt and money? Here’s...
Read more
